
The decision to install an inground pool is significant, requiring thoughtful consideration and planning. This guide is designed to assist you in understanding the process, ensuring you make informed decisions every step of the way.
Pre-Installation Considerations
The first step in installing an inground pool involves several key considerations. First, you need to evaluate your site, considering soil type, terrain, and accessibility for construction equipment. This will affect the feasibility and cost of installation.
Next, you must decide on the type of pool. The three main types are concrete, vinyl liner, and fiberglass, each with its unique advantages and drawbacks in terms of cost, durability, and maintenance.
Furthermore, it’s crucial to familiarize yourself with local regulations and obtain any necessary permits. Legal requirements can vary significantly depending on your location and can influence both design and construction.
Planning and Design
Once initial considerations have been addressed, the creative process of planning and designing your custom inground pool begins. This stage involves several important elements that warrant careful attention.
Identify Your Needs and Preferences: Understanding your needs and preferences is crucial. Do you envision your pool as a tranquil, relaxing oasis or a dynamic hub for family activities and entertaining? Identifying the primary purpose of your pool will influence many aspects of its design, including its size, shape, depth, and additional features.
Size and Shape: The size and shape of your pool are largely determined by the available space in your yard and the overall design of your landscape. A compact design or a plunge pool may be suitable for smaller yards, while larger yards could accommodate expansive lagoon-style pools. Traditional shapes include rectangles, ovals, and kidneys, but the options are limitless for custom shapes.
Material Choice: This is also the stage to finalize your choice of pool material, whether it’s concrete, vinyl liner, or fiberglass. Your choice will influence the aesthetics and maintenance of your pool. For example, a concrete pool allows for more design flexibility in terms of shape and size, but it requires more upkeep than a fiberglass pool.
Excavation
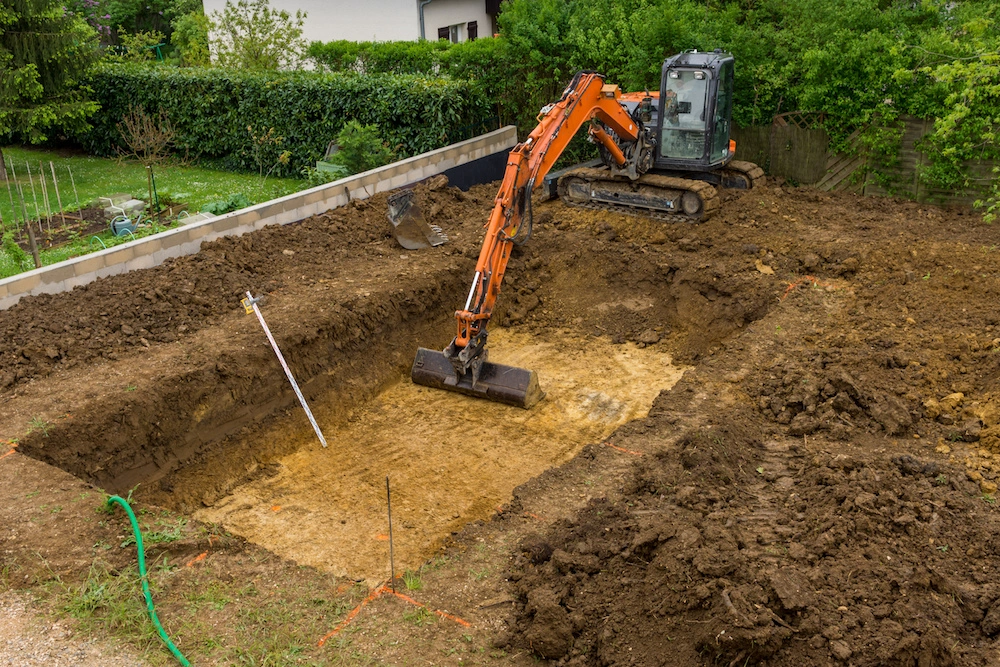
Following the planning stage, excavation begins. This process involves digging up your yard to create the space for your pool. The complexity of this process can depend on various factors like terrain and soil type. Moreover, you need to consider the disposal of the excavated soil, which may entail additional logistical planning.
Pool Structure Installation
After the excavation, the pool structure is installed. The specific steps differ based on the type of pool chosen. For concrete pools, this involves forming and pouring the concrete, while vinyl liner pools require wall installation followed by liner fitting. Fiberglass pools, being pre-formed, are placed directly into the excavated hole. At this stage, the pool’s plumbing system is also installed.
Pool Decking
After installing the pool structure, it’s time to focus on the decking. The pool deck, sometimes referred to as the pool patio, is more than just a functional space—it sets the stage for your outdoor living area and affects the overall aesthetic appeal of your pool.
Choosing the Right Material: Selecting the right decking material is crucial. Each material type—concrete, wood, pavers, and natural stone—has its own set of advantages and considerations.
Concrete: A popular and cost-effective choice, concrete is versatile and can be finished in several ways, such as brushed, stamped, or exposed aggregate, for a more decorative look. However, it may crack over time and can become hot underfoot in sunny climates.
Wood: Wood offers a warm, natural aesthetic that’s ideal for a backyard oasis. However, it requires regular maintenance to prevent splintering and weathering.
Pavers: Available in various shapes, sizes, and colors, pavers can be arranged in unique patterns for a customized look. They’re durable, slip-resistant, and easy to replace if damaged.
Natural Stone: Natural stone, such as flagstone or travertine, provides a high-end look with a non-slip surface. It’s durable and stays cool underfoot, but it can be more expensive.
Installation of Equipment
The next phase involves installing the pool’s vital equipment, including the pump and filter systems. These components are crucial for maintaining your pool’s cleanliness and overall health. Additional features, such as a heating or automated control system, can also be installed at this stage, based on your preferences.
Finishing Touches

With all the main elements in place, the final phase involves adding the finishing touches. For the pool itself, this includes adding an interior finish like plaster, tile, or liner, depending on the pool type. Following this, the pool is filled with water and treated with initial chemicals to ensure it’s ready for use.
Conclusion
In conclusion, while installing an inground pool may seem complex, understanding each stage can make it manageable and enjoyable. With careful planning, informed decisions, and the right team, you can transform your backyard into a personal oasis.

