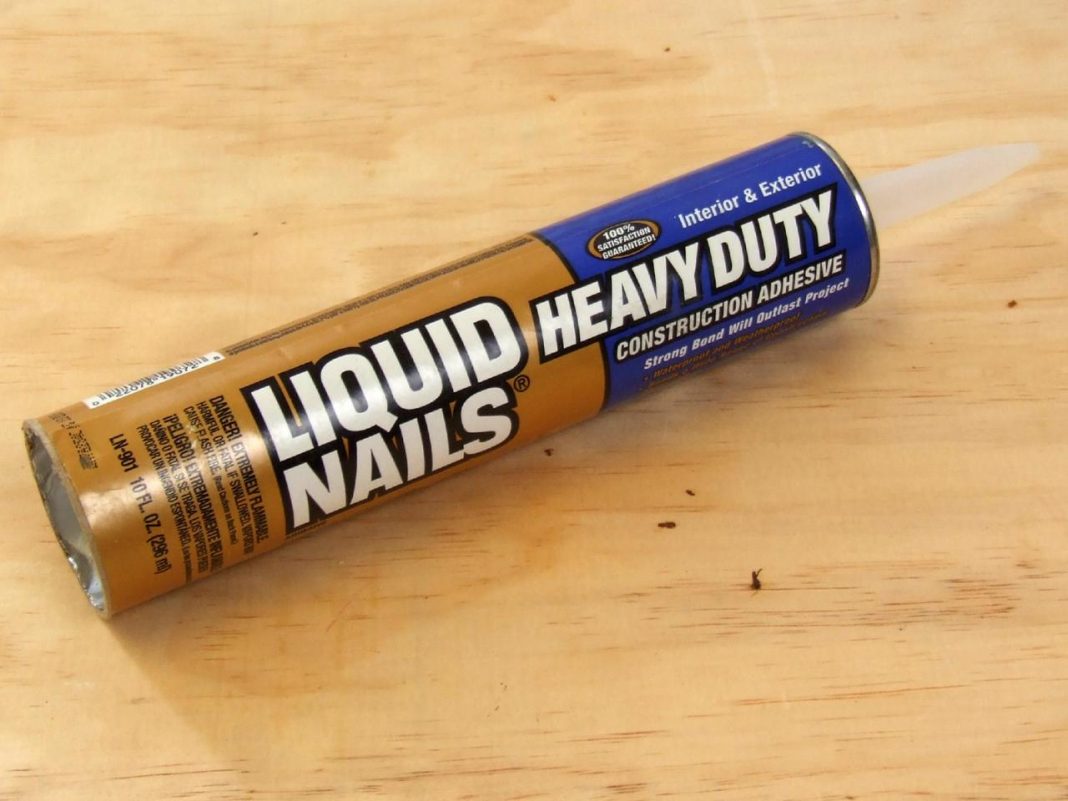
Liquid Nails to Drying Time – Liquid Nails prove to be a fantastic tool to use when you are looking forward to building or repairing something. Sometimes it turns out to be tiresome, while sometimes, it can cause pain due to hammering the portions.
Whenever you are applying the Liquid Nails, you will always have to make sure the material used in it is something that will be drying as soon as possible.
That said, it can also ensure the surface is acquiring the optimal strengthen. Sometimes Liquid Nails drying time also take around seven days at a stretch.
It’s worth noting that the dry time depends on the factors like humidity, temperature, and the material you are using when you have the liquid nail.
A Highlight on Liquid Nails to Drying Time
The Liquid Nails refer to the heavy-duty construction adhesive that helps in bonding things together and is similar to that of the nails wound. These are the ones that find use on the home board, green board, corkboard, fiberglass, and plywood.
Whenever Liquid Nails become dries, it turns out to be flexible and starts curing the outside.
That said, it works for durability and holds the ability to withstand the impact. However, it’s worth noting that the Liquid Nails turn out to be inflammable during the drying time. So you should be very cautious whenever you’re handling it.
Besides, some of them are also water-resistant, but it is always not recommended to use the nails for the lines usually submerged in the water like that of the swimming pool.
The factors that you should take into consideration for determining Liquid Nails drying time-
Temperature
This is one of the most important factors you should consider because the surface temperature can result in the time that is being taken for the bonding together. The lower temperatures are responsible for slowing the drying or curing of the adhesive. Sometimes it also takes a certain time for caulking significantly.
When the drying happens at temperatures around 50 degrees Fahrenheit, it takes around twice as long as it takes around 70 degrees Fahrenheit.
Moisture
This is yet another factor that you should consider. It’s worth noting that the moisture is completely different from the humidity.
The moisture levels always need consideration when it comes to the Liquid Nails drying time determination because of the surfaces for bonding and moisture availability.
The humidity and the moist surfaces are the ones that can make the drying time take a longer time for bonding permanently on the damp or the wet surfaces. You must always make sure about using the rubber or the solvent-based construction adhesive.
Whenever you are working with moist areas, pay attention to using polyurethane or also silicone.
Make sure that you are using hybrid polymer-based products because the moisture helps promote the curing process.
Porosity
This is yet another factor that he needs consideration. This is the consideration that will let you know how the water-based solvents will be getting absorbed into the surface that you’re bonding.
Usually, the non-porous surfaces start with slow drying or the curing time. It somewhat ranges from 24 hours to also several weeks.
At least one of the bonding surfaces should be the one that will be porous as far as possible. Non-porous surfaces come inclusive of the painted surface, plastic, metals, and similar other surfaces.
Amount of the Nails That You Are Using
The largest deposit of the Liquid Nails can be responsible for creating the enhanced drying or the curing time compared to the ones when you are applying in the smaller amounts.
So, whenever you are applying the nails, always make sure that you follow the guidelines for the project and the packaging standard. This decision will make sure that it takes the comparatively perfect time for drying.
Liquid Nails to Drying Time: Depending Factors
The temperature and the porosity are the most significant factors that need consideration when determining the drying and curing time.
Always make sure about going through the product’s technical data sheet if you want to know about the time taken for the drying. Also, develop an idea regarding wood glue and liquid nails.
Wood glue is yet another option for the attachment of things together. Wood glue is the best one that finds use alternative to the liquid nails.
Whenever it comes to the Liquid Nails versus wood glue comparison, you will see that the wood glue usually makes sure about giving the comparatively stronger Bond when it comes to the wooden surface use.
But the problem is the sometimes it take a longer time to become fully dry. Again you can also look for the adhering things like the surface, quick setup, as well as application standard.
Such decisions also make sure about the ideas when you are not supposed to clamping. Surfaces get involved as a factor in the project that can increase the drying time.
Highlight the Difference in the Drying Time
The largest difference between the wood glue and the liquid glue comes in the form that it varies in terms of the drying time. The wood glue sits there for around 15 minutes. When wood glue is used on the wood, it takes 24 hours before applying any kind of pressure on that area.
The Liquid Nails also recommend bracing or clamping to the adhere surfaces for 24 hours, and then adding it requires around one week to cure to the full strength.
The Other considerations that you should follow when it comes to using the liquid nails
Safety and Toxicity
The Liquid Nails turns out to be the same durable as to many other kinds of the glues because it is not harmful or does not have the toxic fumes. Again some glues are also good enough on the cutting boards that means such adhesives work in the form of the food-safe material. The Liquid Nails are a bit different from many other products. These are the products that are composed of solvent-based ingredients.
Right after drying, this product turns out to be no more inflammable or toxic. But it is essential to take into consideration the precautionary measures for handling them. The Liquid Nails don’t usually emit fumes or sometimes latex-based materials. Always make sure about going through the package directions as well as warning details on it for making sure that the Liquid Nails you are using are not too toxic.
The Usage
The wood glue is the one that will be applicable for bonding one piece of the wood to the other outside the building furniture. This is the one that will be absorbed into the forest woods and will be helping sure about the creation of the better Bond.
In case you are looking for the oily would, then it’s worth considering using the sandpaper before your wiping it with Acetone for the proper sealing. The Royal Woods also comes inclusive of Cedar, redwood, or teak wood.
Sometimes it happens so that the Liquid Nails are the ones that will be good enough for everything. However, this is not only the cause that many different versions of the Liquid Nails will be available these days. They are good enough due to their nature and composition. You can also go ahead with using Liquid Nails on the wood, metal, foam, ceramic, or even glass surfaces.
What Is the Speediest Way for Making the Liquid Nails Dry Even Quicker?
If you are using the Maximum strength Nails, and you do not have enough time to wait for around seven days at a stretch, then it’s worth considering certain processes that will make sure about the drying process faster. However, it’s good enough to never put on a lot of stress on that material because it will be just breaking down the components, and you will have to always keep repairing. So if you want to dry the surface properly, you must follow certain practices. They are as follows.
Always make sure about using the only amount of the material that’s needed
For the application of the Liquid Nails, go with taking the care of applying the optimal amount. It’s worth considering the drying time. Sometimes some pieces come with extended periods of drying, and you will have to always apply that selectively thin layer of the material that will be making sure about taking the lesser drying time.
Always consider having a nice fan that will be giving the cool Breeze across the area.
Apart from just waiting for the Liquid Nails to dry up on their own, it’s worth considering keeping a fan giving the cool Breeze for the drying up of the area as soon as possible. Always make sure about never pointing the fan directly at it. But always make sure that you are improving the airflow. This decision will be making sure that the area doesn’t stay humid and will be good enough for the Liquid Nails to become dry as soon as possible.
Keep it away directly from the heat
In the case of Liquid Nails, heat will be responsible for taking a lot of the time for drying. So whenever you are keeping the room cool, you can rest assured that the speed of drying will be increased. A temperature of around 60 to 70 degrees will be good enough for the quick bonding. However, make sure about not keeping the room too cool because sometimes it happens so that the bonding agent may not be working good enough and will be responsible for falling out again.
Is the Gorilla Glue Stronger Than the Liquid Nails?
According to the website, the original Gorilla glue can be the best one for bonding with similar surfaces, just like wood or plastic, or ceramic. On the other hand, Liquid Nails always keeps advertising itself in the form of the construction glue that will be good enough for building and home repair jobs. Depending on the nature of the project you are considering, you will have to choose the one that will be better than the other.
So How Many Liquid Nails Do I Need?
Application around 14 inches of continuous Liquid Nails is good enough for heavy-duty construction. Always make sure about putting the adhesive up to 10 to 12 inches across the back of the panel. Make sure that keeping around one inch away from the edges gives better results. It’s worth considering drilling into the liquid nails.
The Liquid Nails alongside the screws Will Be Holding them in place. Once you fasten it, you will require drilling the hole in each of the blocks. Ensure drilling The Pilot hole right into the top of the surface so that the screw can go in easily.
Final Words
You have got the concise Idea regarding Liquid Nails drying time. The best part is that they are high strength, are fit for multipurpose construction. These adhesives are best for giving you support during the work with the particle board, glass board, concrete tiles, and the other needs.


